Kate at Centsational Girl featured my ottoman makeover along with a lot of other great bloggers. Thanks Kate, I'm thrilled and honored. Check out Kate's blog for great decorating and DIY tips.
Friday, April 29, 2011
Thursday, April 21, 2011
Hello Gorgeous
It's all her fault, I was very happy with my old girl until I saw her, I was smitten and intrigued. How would she look in my house? I was saddened to know that she could never come and live with me. The price was to high. When you see her you will understand the source of my fascination and desire. Here see for yourself why I was smitten:
Isn't she a beauty? I became so enraptured that I started to look at my old girl in a different light. She had been with me for years, but like all girls eventually do, she needed a new look. We talked it over and she agreed a makeover was in order. But how? What could we do to take her from this
To something like this:
The Quest started with a google search. There I found the answer.I learned what tools to use to transform my old girl into a newer version of her self. After much research and with a lot of excitement and anxiety she was transformed into this:
She has given me permmssion to share the secrets of her transformation. Here's what we did:
The bottom detail and legs are wood so I had to prime them before painting. I didn't dilute the paint for the wood part. I really love it and even my husband who was skeptical raves about it every time he passes it by. I think he's told me its beautiful 100 times. I hope you like it too. Stay tuned for the chair later next week. Have a happy and Blessed Easter everyone. I'm joining Cindy at My Romantic Home for Show and Tell Friday. I'm joining Centsational Girl's Fair Weather Forum Linky Party. And Layla at The Lettered Cottage for How To's Day and Funky Junk Interiors SNS and The Newbie Party at Debbie Doos Blogging and Blabbing and Thrifty Decor Chick's Before and After Party.
and Transformation Thursday at The Shabby Chic Cottage
Homemaker On A Dime for Creative Bloggers Blog Hop.
![]() |
| Photo shabbychic.com |
To something like this:
![]() |
| shabbychic.com |
| texture detail |
She has given me permmssion to share the secrets of her transformation. Here's what we did:
- Wash with a mild soap and water.
- Rub over leather surface with denatured alcohol
- The alcohol removes all wax and polish
- Sand the leather lightly with fine sandpaper to allow the paint to adhere
- Mix a 50/ 50 mixture of paint and water, this creates a wash
- Apply a very thin coat of the wash
- You should be able to see the original color through this first application
- Let dry one hour
- Apply second thin coat let dry one hour
- Repeat until you get the desired coverage.
| Before |
| After |
The bottom detail and legs are wood so I had to prime them before painting. I didn't dilute the paint for the wood part. I really love it and even my husband who was skeptical raves about it every time he passes it by. I think he's told me its beautiful 100 times. I hope you like it too. Stay tuned for the chair later next week. Have a happy and Blessed Easter everyone. I'm joining Cindy at My Romantic Home for Show and Tell Friday. I'm joining Centsational Girl's Fair Weather Forum Linky Party. And Layla at The Lettered Cottage for How To's Day and Funky Junk Interiors SNS and The Newbie Party at Debbie Doos Blogging and Blabbing and Thrifty Decor Chick's Before and After Party.
and Transformation Thursday at The Shabby Chic Cottage
Homemaker On A Dime for Creative Bloggers Blog Hop.
Labels:
OTTOMAN PAINTED LEATHER PAINTING
Sunday, April 17, 2011
Works In Progress
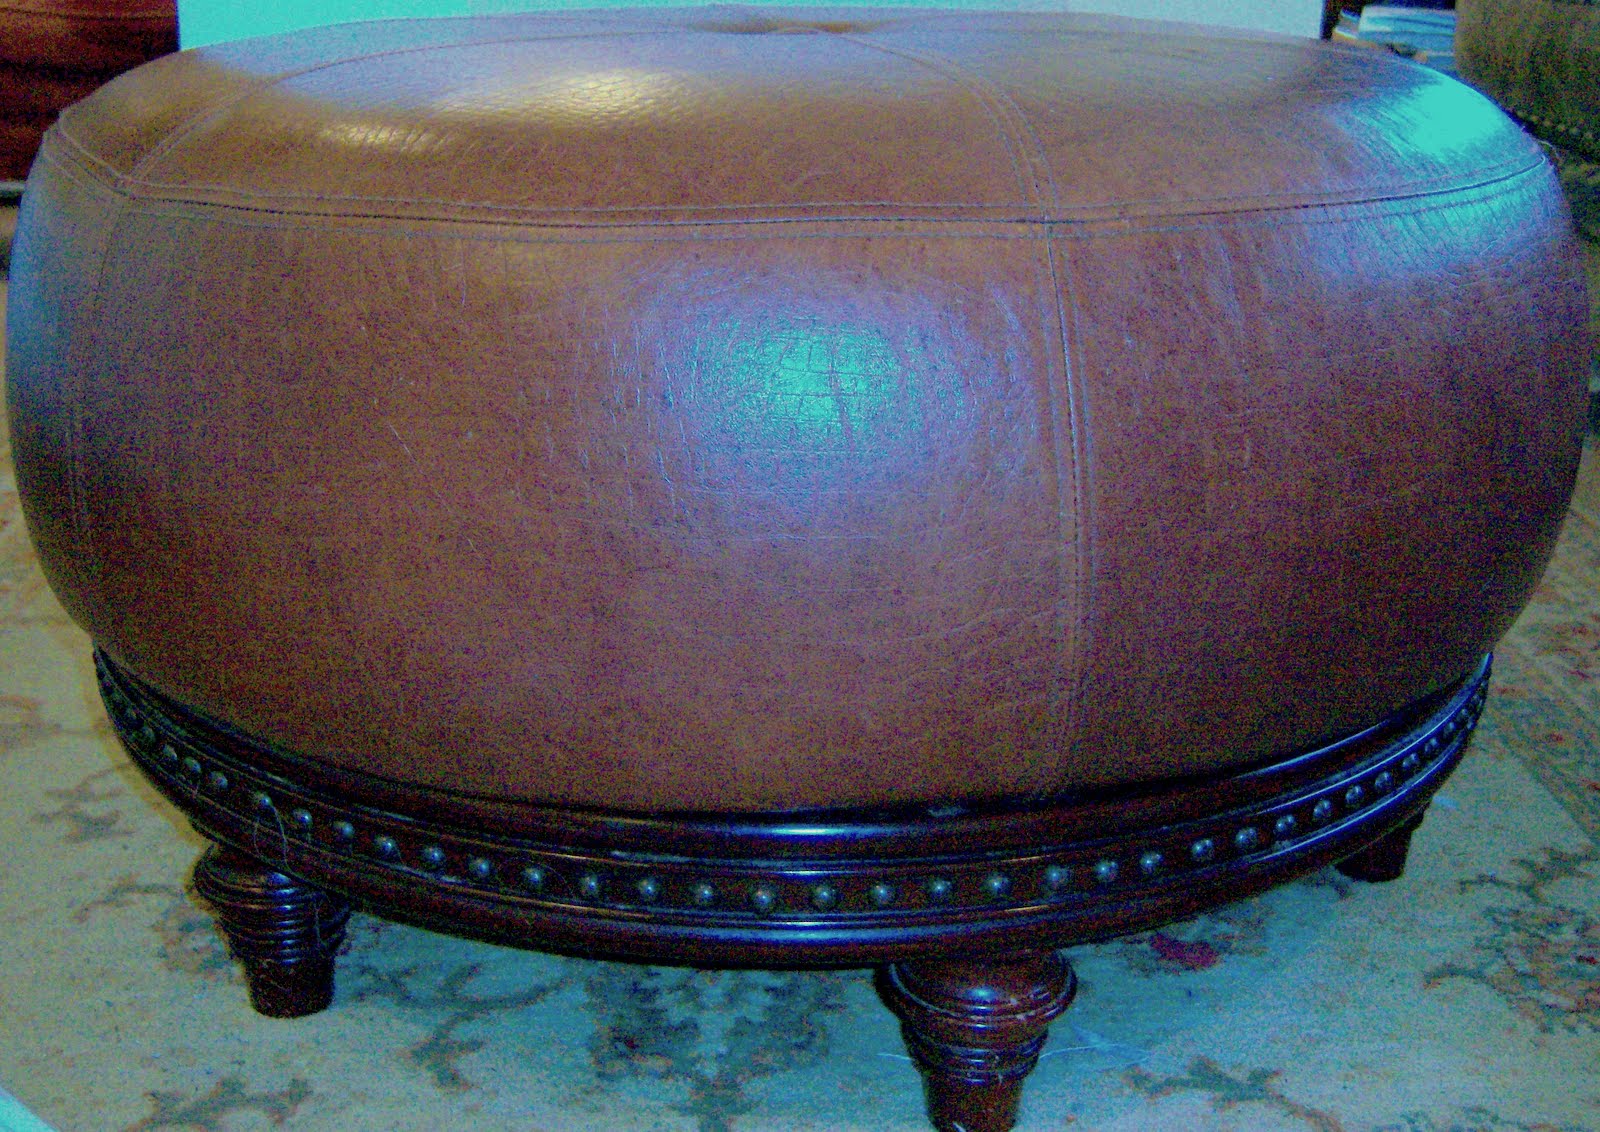
I'm in the process of redoing my ottoman and a chair. I'm trying something I have never done before with my ottoman. I'm a little nervous, but if I fail or succeed I'll let you know how it turns out. Here are a couple of before shots:
I bought this ottoman at the Bombay Co. years ago. I've been using it as a coffee table. I still really like it but since I'm lightening everything I decided to give it a new look. I saw an ottoman on the Shabby Chic website that made me swoon, so I'm going to try to get that look.
This chair Is from the Martha Stewart Collection. It's really comfy but the fabric is worn out. I love the tufting and the shape but it needs a makeover to fit in with my new color scheme. After 8 years I think a new look is due, plus it looks a hot mess. Its threadbare on the arms faded and just plain worn out. Its getting a whole new look and a little whimsy. So stay tuned ladies. I'll be having the big reveals later in the week. What are you up to? I'm joining Debbie Doos Blogging and Blabbing Newbie Party.
Labels:
ottoman redo chair redo
Sunday, April 10, 2011
Easter Softly
I wasn't going to decorate for Easter because my house is in disarray but after seeing so many gorgeous Easter vignettes in blog land I decided to create a small tabletop vignette. I love bunnies and chicks but I decided to do something a little different. Easter is a very holy holiday so I went with that aspect. I used one of my Mary planters and a Cross that I bought from the dollar tree. I added silver leaf to the raised parts of the Cross. I also decorated plastic eggs that I bought from the Dollar Tree with hand stamped tissue paper and silver leaf. I glittered some of the eggs with a mixture of glass glitter and glamour dust. I created an arrangement in an urn that I've had for many years. It used to be a deep burgundy... I spray painted it silver using Krylon spray paint in Metallic Brilliant Silver. I added twigs from my back yard and some silk Cherry blossoms that I had on hand. I arranged them in the urn an added moss and tiny birds nest to the branches. I put three of the decorated eggs in the urn on top of the moss. I painted some crystals turquoise to use on a chandelier for my kitchen. I decided to add them to the branches for a little color and sparkle. Besides my kitchen is a long way from having the chandy hung might as well put the crystals to good use. Here are some shots of my vignette;
This is something different than my usual but I really like it. Its very soothing somehow. I hope you like it too. I'm linking up with Centsationl Girl's Fair Weather Forum and Debbie Doos bloggin and Blabbin Newbie Party and My Romantic Home for Show and Tell Friday and Decor To Adore's Spring Craft Linky Party.
| The complete vignette |
| The urn arrangement |
| Close up of birds in branches |
| Decorated eggs in my PB knockoff hurricane |
| Close up of center of the urn arrangement |
| The glittered and decoupaged eggs |
| Blessed Mother |
| Silver leafed dollar store cross |
| Eggs in urn arrangement |
| Another look. |
Wednesday, April 6, 2011
The Slip
Hello all,
I've been m.i.a. for a while, but I'm glad to be back. I've been recuperating and not able to do a lot of big projects. As soon as I felt like I wasn't going to meet the true death (True Blood Fans?) I made a few a pillow slips and did a few other small projects. I wanted grain sack pillows... however the cost of vintage grain sacks are not in my budget, so I made faux grain sacks from drop cloth fabric and paint. I also made burlap pillows...two plain and two with images transferred onto them. I don't know about you guys but I really like the Union Jack on pillows, so I made a shabby chic version on burlap. So without further ado here are the pillows:
I made pillow slips to cover the down pillows that came with my sofa. I have more to share later, but I'm off to run errands. I don't know why my pics have this weird blue tone. Oh well..you get the idea. Later peeps.
I'm linking up at Elements Interiors for Whassup Wednesday and Savvy Southern Style for Wow us Wednesday and The Shabby Chic Cottage for Transformation Thursday and My Romantic Home for Show and Tell Friday.
Subscribe to:
Posts (Atom)

